
Frequent Ask Questions
EMAILS
How to sync the calendar from and to outlook
how-to-sync-to-smartermail
How to fix the SSL pop up screen issue in windows 7 computer when accessing outlook
How to fix the SSL pop up screen issue in windows 7 computer when accessing outlook, please click below link.
How to setup email address in Microsoft Outlook 2016
Step 1 - Open Outlook and click File
Open Outlook on your computer and click File in the top left corner.

Step 2 - Click Add account
Click Add Account to start setup.

Step 3 - Type in your email address
Type in the email address you want to add and click Connect.

Step 4 - Connect your account
Outlook will automatically detect the right server settings, click Connect to continue.

Step 5 - Enter your password
Type in your password, it is the password that you also use to login to Webmail. Click OK to continue.

Step 6 - Close automatic setup
Click OK to complete setup.

Step 7 - Click File again
Your email account is now set up, but you need to add an additional setting to make sure all emails are delivered to the correct folders.
Click File again.

Step 8 - Click Account Settings
Click Account Settings.

Step 9 - Click Change
Select the account you just set up and click Change in the menu right above it.

Step 10 - Click More Settings...
Click More Settings... in the bottom right.

Step 11 - Set the Root folder path
# Click the Advanced tab.
# Type in INBOX as the Root folder path, all in capitals.
# Click OK to save your settings.

Step 12 - Test the account settings
Click Next to continue.
Outlook will now test your account settings by trying to send a test message. Click Close when the tests are completed.

Step 13 - You are done!
Click Finish to go to your inbox. You can now see that all folders are on the same level as your inbox.
How to setup email in your Gmail account
How to setup email in your Gmail account step by step instructions, please click below link.
IMAP Inbox problem "Cannot move the items. The item cannot be moved. It was already moved or deleted, access was denied or the server unavailable."
One of my email accounts is imap. The inbox having some weird behaviours. I cannot delete or move emails out of this account as I get the message "Cannot move the items. The item cannot be moved. It was already moved or deleted, access was denied or the server unavailable."
However I can move or delete the same email on another machine running outlook 2013. I tried deleting and recreating the account on the machine running the 2016 preview. I also tried to fix the pst files and this did not work either. I also have Mac running outlook 2016 but there everything is fine.
Solutions:
Under Folder|Purge|Purge Options I had to check the boxes at the bottom of those settings to make items marked for deletion actually disappear. Every time I 'deleted' an item, Outlook was moving a copy to imap Deleted Items/Trash folder but was not removing it from the item's current folder (Inbox or whatever.)

Setup your email in IPhone
Smartermail iPhone step by step instructions, please click below link.
Setup your email in android device.
Smartermail android step by step instructions, please click below link.
I can receive email but I am unable to send email, why ?
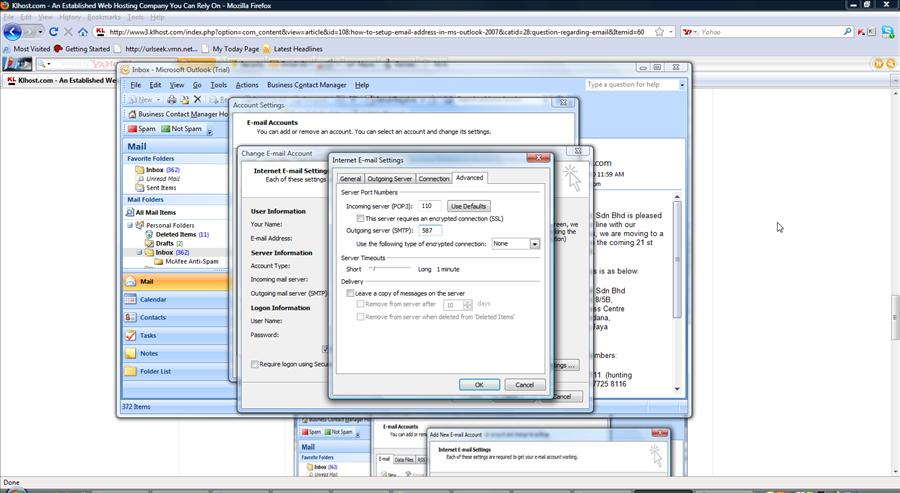
Make sure that "My server requires authentication" option was checked and also The Outgoing SMTP port number was changed from 25 to 587.
How to setup email address in Microsoft Outlook
Go to Microsoft Outlook 2007 , Choose "Tools" - "Account setting.."

Click on the " new... " option and fill in your email address's information as shown below. Remember to "Tick" on Manual Configure server settings or additional server types. Once completed, clcik on the "next" button.

Choose "Internet E-mail" and click on the "Next" button.

Fill in your email address's information as below and click on the "More Settings.." button.

Click on "Outgoing Server" option and "Tick" My outgoing server (SMTP) requires Authentication. Once Completed, Click on the "OK" button.

if you are using Streamyx ISP, You need to change the Outgoing SMTP Port from 25 to 587. Click on the "Advance" option, change the "Outgoing server port" number from 25 to 587.
For others ISP, you may leave it as "25".
Click on the "Next" Button.

Click on the "Finish" button.

You will see your email account appear on the "Account Settings" menu. Click on the "Close" button and you are ready to send and receive email now.

Configuring spam filtering
Spam Filtering
| This settings page is only available to admin@example.com. |
SmarterMail includes many advanced antispam measures that will help protect your users from unwanted email. The system administrator has probably already set up some default spam options. Domain administrators can further modify these settings as well as set up rules forContent Filtering and Domain Auto-cleaning.
To view the spam filtering settings for your domain, click the settings icon. First expand Domain Settings, then expand the Filtering section and click Spam Filtering in the navigation pane. The spam filtering settings will load in the content pane and the following tabs will be available:
Options
Use this tab to set the following spam filtering options for the domain:
- Use default spam settings - Choose this option to accept the default spam options provided by your system administrator. The settings will be displayed for your reference.
- Override spam settings for this domain - Select this option to customize the way spam is handled. Spam check weights and actions will become overridable by end users. More information about the types of actions allowed can be found below.
Actions
When you override the spam options set by your system administrator, you can choose the actions that are taken when email comes in that has a low, medium, or high probability of being spam. For each spam level, choose the action you wish to have taken. If you choose to add text to the subject line of messages, type the text in the box below the action drop down.
Adding email aliases
Email Aliases
| This settings page is only available to admin@examples.com |
An email alias is essentially a forwarding email address that can be used to forward messages to a single address or multiple email addresses. Aliases are most commonly used for departments or groups of individuals, like a small team of people working on a project or task.
For example, in a working environment with multiple email addresses, the office may want to make a central email address that distributes messages to all personnel. The alias workplace@example.com can be made for messages to be sent and then distributed to all of the employees.
To view a list of email aliases for the domain, click the settings icon. Then expand the Domain Settings folder and click Aliases in the navigation pane. A list of existing aliases will appear in the content pane.
To create a new email alias, click New in the content pane toolbar. To edit an existing email alias, select it and then click Edit in the content pane toolbar. Whether creating a new alias or editing an existing one, the settings for these will appear in a modal pop-up and the following options will be available:
- Alias Name - The name of the alias. This name will be used to create the email alias address. For example, if you named the alias "info" and the domain was "example.com," the email alias address would be info@example.com.
- Email Address (one per line) - Type the full email address(es) of the user(s) who should receive the messages sent to this alias.
- Include all domain users - Select this option to include all domain users automatically in the alias. Note: This option does not override the email addresses listed in the Email Address box. If selected, all domain users will be included in addition to the users entered in the Email Address box.
- Enable in Live Chat (XMPP) - Select this to allow the alias to appear as a contact in live chat. Enabling aliases for live chat means that instant messages can be sent to the alias from within webmail as well as when using third-party chat clients.
- Show in Global Address List - Select this to display the alias in the Global Address List.
- Internal only - Select this option to only allow emails to be received from addresses within the alias’ domain.
Note: Even though an alias acts as an email address, users cannot login to an alias like they do a standard email address since no email is ever actually stored for the alias. Emails are just sent to the list of addresses provided for the alias.
A Note About Catch-All Aliases
A catch-all alias is simply that: an alias that catches all email sent to a domain that doesn't correspond to an actual account. Catch-all aliases can be useful as long as they are monitored and kept clear of unwanted email. However, due to the nature of email and the amount of spam that is sent every day, a catch-all can become a burden to email systems and to domain administrators. Therefore, it is suggested that they be used sparingly, or not at all if it can be avoided.
Adding email accounts
Users
| This settings page is only available to admin@examples.com. |
An email user account represents a person's actual mailbox and email address. For example, jdoe@example.com. User accounts can receive email, send email, and login to the Webmail interface in addition to using the other features of SmarterMail. This includes things like calendaring, creating and sharing contacts, creating and managing tasks using SmarterMail's live chat and much more.
To view a list of users on a domain, click the Settings icon. Then expand the Domain Settings folder and click Users in the navigation pane. A list of users will load in the content pane.
Adding a new user and editing an existing user are essentially the same process, and they both deal with similar settings. To create a new user, simply click on the New button in the content pane toolbar. To edit a user's settings, select the desired user and click Edit in the content pane toolbar. You can also double-click on a user to open their settings. Regardless of the method used, the user settings will load and the tabs listed below will be available. Note: When editing a user’s settings, use the Rename button in the content pane toolbar to change the username.
User
Use this tab to specify the following user-based settings:
- Username - The identifier the user uses to login to SmarterMail. This is the portion of the email address that comes before the domain name. For example, the "jdoe" part of jdoe@example.com.
- Temporary Password - Note: Only System Administrators managing/impersonating the domain will see this option. This option allows System Administrators to create an additional, temporary password in order to troubleshoot account issues. A user’s actual password will never be shown in the Web interface. Creating a temporary password, rather than impersonating the account, may be required when it's necessary to log into a user's email or IM client where impersonation is not available. In addition, administrators will find that some behavior in webmail may be slightly different depending if an accuount is impersonated or logged in directly. For example, when you impersonate a user, the Domain Admin's settings always show, even if you're impersonating a user that isn't a Domain Admin. For a clear idea of the options available to the user, an administrator may wish to log in directly instead. Clicking Manage will open a modal window where the temporary password can be generated. Only one temporary password may be created at a time, and on creation, will be available for 24 hours. Extend the time remaining or revoke the password by clicking on Manage again in the user settings and choosing the corresponding button. Choosing to extend the password will add 24 more hours to the remaining time. Note: Creating and using a temporary password does not disable the user's standard account password or impact their ability to log in or access webmail.
- Authentication Mode - The authentication method used to login to SmarterMail. By default, SmarterMail will use its included username/password authentication. However, SmarterMail can also be integrated with customers using Microsoft Windows Active Directory for their corportate logins. For information on Active Directory integration, visit the SmarterTools Knowledge Base.
- Domain - The Domain to authenticate against when Active Diretory is used for the Authentication Mode. Note: This feature is not displayed if SmarterMail is used as the Authentication Mode.
- Password - The password for the user to login to Smartermail. Note: This feature is not displayed if Active Directory is used as the Authentication Mode.
- Confirm Password - The password confirmation for the user to login to Smartermail. Note: This feature is not displayed if Active Directory is used as the Authentication Mode.
- Display Name - The friendly name that is displayed on outgoing messages.
- Reply-to Email Address - The email address used in the reply-to header of messages sent through webmail. This address will be used by receiving email clients when replying to a message.
- Time Zone - The time zone to use for marking the sending and receiving date and time.
- Backup Email Address - This is a backup email address that can be used for password recovery information should a user forget their mailbox credentials.
- User Status - Domain administrators can change the status on a mailbox to limit a user's access as needed. For example, if a user leaves the company, either voluntarily or not, a domain administrator can suspend the account pending further review by company management. Options include:
- Enabled - The mailbox is in use by the user.
- Disabled and allow mail - The mailbox continues to receive email but the user is unable to access their mailbox.
- Disabled and don't allow mail - The mailbox no longer accepts incoming messages and the user is unable to access their mailbox.
- Mailbox Size Limit - The maximum size of the mailbox. By default, the maximum mailbox size is 100 MBs. However, domain administrators can change this to whatever they like to correspond to company limits. For unlimited disk space, type in 0.
- Calendar Auto-Clean - SmarterMail allows domain administrators to keep users' past calendar events from cluttering up calendar views. By default, this is set to Domain Default which is set in the Default User Settings.
- Enable domain administrator access - Select this option to allow the user to edit domain settings.
- Disable password changes - Select this option to prevent the user from changing the login password. This setting overrides the password expiration found in Security settings. A user's password will not expire or be required to be changed if this setting is enabled.
- Enable ActiveSync - Select this option to add Exchange ActiveSync to a mailbox.
- Show in Global Address List - Select this option to add the user to the Global Address List. Use this option on accounts that are tied to real people as opposed to addresses used by departments, such as support@example.com.
- Enable POP retrieval - Select this option to allow users to download email via POP from other email accounts. For example, if a user has a second email address that they monitor, enabling this option allows the user to set up POP Message Retrieval for that address and download email sent to that address into their SmarterTools mailbox. Note: POP retrival will take the mail from the original mail server and download it into SmarterMail, thereby deleting the message from the original mailbox.
- Enable IMAP retrieval - Select this option to allow users to download email via IMAP from other email accounts. For example, if a user has a second email address that they monitor, enabling this option allows the user to set up IMAP Message Retrieval for that address and download email sent to that address into their SmarterTools mailbox. Note: IMAP retrival will take the mail from the original mail server and download it into SmarterMail, but it leaves a copy of the message in the original mailbox.
- Enable SMTP Accounts - Select this option to allow users to send email from a third-party mail server account right from within SmarterMail. For example, if a user has a second email address that they regularly use, enabling this option would allow the user to set up an SMTP Account for that address and choose which account to send from when composing new messages.
- Disable greylisting - Greylisting is an anti-spam measure that rejects the initial incoming message from an uncrecognized email address and waits for the sending mail server to attempt to resend the message before it's allowed to be delivered. While effective, this can also lead to a delay in message receipt. Domain administrators can disable greylisting on a user-by-user basis as needed, while allowing it for other mailboxes. Note: This setting will only be visible if greylisting has been enabled for the server.
- Enable outgoing mail signing - Selecting this option means outgoing messages will be signed via DKIM.
Webmail
Use this tab to specify the following Webmail settings:
- Initial Page on Login - The page users will see upon logging in to SmarterMail. Users can either go directly to their Inbox or go to the My Today Page.
- Display Format - To specify the default format used for displaying messages, select the appropriate option from the list.
- HTML - This option will display messages and their HTML content, if present in the email. This content can include stylistic elements such as special fonts or colors, as well as hyperlinks, images and other formatting elements.
- Text - This option will only display text, without any special formatting. While it is less interesting (no fonts, images, etc), it is also much more secure and is faster to view than HTML.
- Sort Messages by - The order in which messages are displayed. By default, messages are displayed by date in descending in order.
- Delete Action - To specify the action performed on deleted messages, select the appropriate action from the list.
- Move to Deleted Items folder - Deleted items will appear in the deleted items folder, which will need to regularly be emptied.
- Auto Purge Folder - Permanently deletes the message. Note: When deleted messages are purged, the action is final. You will not be able to retrieve these messages later.
- Mark as deleted - Flags the message for deletion, but it will not be removed until the folder is purged.
- Mark as deleted and hide - Flags the message for deletion and hides it from view, but it will not be removed until the folder is purged. Note: Be careful to monitor your disk space usage when using this option, as it may fill up with what appears to be a small number of messages.
- Preview Pane - To specify where the preview pane displays in the webmail interface for users, select the appropriate option from the list. By default, the preview pane appears at the bottom of the content pane. Disabling the Preview Pane means only a list of messages appears in the content pane and each message will need to be opened separately in order to view their contents.
- Disable image in preview pane - Select this option to prevent images from appearing when users view messages in the preview pane. You may want to select this to enable messages to load faster. Note: By selecting this option, images will still appear when a messages is opened outside of the Preview Pane.
- Enable reminder popup window - Selecting this option means that any reminders will display in popup windows. If a user's browser has a popup blocker, the email server URL may need to be added to allow reminder popups to display. This is enabled by default.
- Enable sounds - Select this option to enable sounds in webmail, such as when a new chat message is received.
- Enable new message notifications - Select this option to display a temporary notification in the webmail interface when a new email message is received. This notification will display no matter which section of the interface is selected and generally appears in the lower part of your screen.
- Disable reminders for appointments and tasks - Select this option to disable all reminders for appointments and tasks for users.
- Mark messages downloaded by POP3 as read - Select this option to mark messages as read on the server when downloaded in the client by POP3.
- Mark messages sent to junk as read - Select this option to mark messages as read on the server when marked as spam.
- Show HTML hyperlinks when printing - Select this option to add link URLs in parenthesis to the right of the hyperlinks when printing email messages.
Compose
Use this tab to specify the following settings for the Compose window that opens when a users begin writing emails:
- Text Encoding - To specify the character set used in messages composed through the Web interface, select the appropriate option from the list. By default, SmarterMails sets the encoding to Western European (ISO). However, SmarterMail supports encoding for over 35 different text formats, thereby supporting message encoding for most parts of the world.
- Compose Font - To specify the default font and font size for emails, select the appropriate option from the list.
- Spell Check Dictionary - To specify the default dictionary to use for spell-checking emails, select the appropriate option from the list. SmarterMail offers dictionaries for over 17 different languages. If the user is unsure, they can select the option to use the same spell check dictionary that matches the language they selected when they logged in to SmarterMail.
- Forwarding Method - To specify the method by which messages are forwarded, select the appropriate option from the list.
- Normal - Includes original content, including font styles from original message, as part of the new message.
- Text - Inserts the plain text version of the original message into the new message. This is useful if you want to exclude links, fonts or other formatting.
- Embed as Attachment - Attaches the original message to the new message as an attachment. The message will not appear in the body of your message.
- Auto Save Frequency - To specify how frequently SmarterMail saves a draft of a message a user is writing, select the appropriate option from the list. The default setting is 2 minutes.
- Reply Header Type - To specify the header type, select the appropriate option from the list. Note: For most users, basic headers will be sufficient. Basic headers include From, To, and Subject headings whereas the full header includes MIME type filter restrictions, etc.
- Compose Format - To specify whether new messages are composed in HTML or plain text, select the appropriate option from the list.
- Reply Text Indicator - This sets the character that is appended to the beginning of each line of an original message when that message is replied to.
- Include previous replies in reply - Select this option to embed the text of the original message in a message reply. This includes text from messages in reply threads.
- Enable sent items folder - Select this option to save all outgoing messages in the Sent Items folder. Note: If you send many messages, you may need to delete items from this folder regularly.
- Enable read receipts by default - Select this option to create read receipts for all outgoing messages. Domain administrators should be careful when enabling this and only do so if required for business or compliance or regulatory requirements.
- Enable trusted sender for webmail recipients - Select this option to add the email addresses that users send mail to through webmail to their trusted senders list. This means that any email from these addresses is automatically trusted by SmarterMail and will avoid any spam filters.
- Disable X-Originating_IP header in messages - Select this option to remove the user's IP address from the X-Originating_IP header when sending messages via webmail. Some people prefer that their IP address isn't included in the header of emails that are sent out as they feel it is a potential security risk.
- Warn about common email mistakes prior to sending - Enabling this means that SmarterMail will quickly review any message sent to check for items like missing attachments. This includes times when the work "attachment" is used in the body or subject of the message, but an attachment is not being sent with the email message.
- Automatically check spelling prior to sending - Enabling this means SmarterMail will quickly review any message sent to check for spelling and grammar issues when sending via webmail.
Forwarding
Use this tab to set up SmarterMail to forward received messages to another email account. This is a way to send copies of emails to an outside entity, or to a separate email address the user prefers to check.
- Forwarding Address - The email address(es) to which messages will be forwarded. Separate multiple email addresses with a semi-colon or comma.
- Delete messages when forwarded - Select this option to automatically delete messages from the user's SmarterMail inbox after those messages are forwarded.
Reading messages
Reading Email Messages
SmarterMail displays whether you have unread email in your inbox, or in any folders, a number of different ways. Note: The first three notification types are demonstrated in the email interface diagram.
- The number of unread messages will display next to the name of the folder in the navigation pane.
- Unread messages display as bold in the content pane.
- The number of unread messages in your inbox displays as part of the Email icon in the icon bar, to the left of the content pane.
- A new message notification, also known as a "toast notification," will temporarily display in the lower left corner of the webmail interface. Note: This feature can be disabled from the Account Settings page.
To view the contents of a message, simply click the desired message and it will load in the preview pane. You can also double-click the message and it will open in a separate pop-up window.
In general, the following options are available when viewing a message in a pop-up window:
- Reply - Allows you to respond to the sender only.
- Reply All - Allows you to respond to the sender and everyone else who received the message. This includes all email addresses listed in the To and Cc fields, except your own email address.
- Forward - Allows you to send the message to a third-party, not in the To or Cc fields.
- Delete - Moves the message to the Deleted Items folder. Note: This is the default action taken when a message is deleted. Depending on your account settings, the delete action may be different. For more information, see Deleting Email Messages.
- Move - Moves the selected message(s) to any available folder.
- Mark - Click this button and select the appropriate option to mark the selected message(s) as follow-up, no follow-up, or spam.
- Follow-up - Marks the selected message(s) for follow-up and changes the color of the follow-up flag appropriately.
- No follow-up - Removes the selected message(s) as being marked for follow-up and changes the color of the follow-up flag appropriately.
- Spam - Marks the message as spam and moves it to the Deleted Items folder.Note: SmarterMail uses Bayesian filtering to evaluate the header and content of an incoming message and determine the probability that it is spam. This type of spam filtering "learns" to differentiate real mail from unwanted junk mail by examining the words and punctuation in large samples of both types of messages. As a result, every time a user marks a message as spam, the Bayesian filtering improves. For users with the Message Sniffer or Cyren Premium Antispam add-on, messages marked as spam will be sent to the appropriate center for evaluation.
- Add - Creates a new task and links it to the message. For more information, see Linking to Email Tasks.
- View - By default, SmarterMail displays messages in HTML format because it provides formatting and markup capabilities that are not available in plain text. However, there may be times when you want to view the message in a different format or you need to view more than the message content. The different view options are as follows:
- HTML - Displays the message in HTML format, which allows for colors, fonts, graphics, and other formatting.
- Text - Displays the message in plain text, which only allows text content with no special formatting or graphics.
- Raw Content - Displays the content of the email exactly as the server received it. This is helpful if you cannot view the message in any other display mode.
- Header - Displays the header of the message, which indicates the path the email took to get to your email account, along with several other pieces of information.
- Print - Prints the message in whatever View you're in. For example, if you're viewing the raw content of the message then hit the print button, you will print the raw content.
- Close - If a message is opened in a new window, this closes the window.
Downloading Email Attachments
If the message has an attachment, a paperclip will display in the header of the message. In addition, an attachments tab will display under the message header in the preview pane. To view a file that was attached to a message, click the attachments tab and then click the appropriate file. Attachments can be downloaded and viewed individually or it's possible to dowload all attachments in one .ZIP file by simply clicking the Download All Attachments link that appears at the top of the Attachments tab.
SmarterMail also makes it easy for users to see all messages that contain attachments. Simply, expand the By Type click All Attachments at the bottom of the navigation pane.
Sending messages
Composing Email Messages
It's very easy to create new messages in SmarterMail as well as reply to existing messages or forward messages on to other individuals or groups. Below you'll find a brief walkthrough of each scenario.
Creating a New Message
To create a new message, click New in the navigation pane toolbar or click New + Messagefrom the icon bar. This will open a new message window that you will use to compose the email message.
The following fields will appear in the header of the message:
- From - Select the email address from which the message will be sent and/or the signature to use in this message. Note: This field only displays if the user has multiple addresses from which messages can be sent in SmarterMail (SMTP accounts or domain aliases) or has multiple signatures configured for the account. If the domain administrator has disabled the ability to override domain-level signatures, the user cannot choose an alternative signature for their SmarterMail email address.
- To - Type the email address for each primary recipient you want to receive your email. Multiple addresses can be used, simply separate each with a comma or semi-colon. Alternatively, click To in order to open your address book/contacts list and select recipients from there. SmarterMail Enterprise users can change the address book used to select email addresses from the Global Address List. Note: When entering addresses into the To, Cc, and Bcc fields, SmarterMail will auto-complete addresses by referencing your contacts list, mailing lists, your Auto-complete list, aliases or the Global Address List.
- Cc - Type the email addresses of recipients that should receive a carbon copy of the message. Alternatively, click Cc in order to open your address book/contacts list and select recipients from there.
- Bcc - Type the email addresses of recipients that should receive a blind carbon copy of the message. Alternatively, click Bcc in order to open your address book/contacts list and select recipients from there. Note: Emails listed in this field will be concealed from the complete list of recipients (those listed in the To and Cc fields). In addition, in a Reply All scenario, Bcc users do NOT receive a copy of the reply. For this reason, it is common practice to use the Bcc field when addressing a very long list of recipients or a list of recipients that should not (necessarily) know each other.
- Subject - Type a descriptive subject or title of the email.
The following options are available in the toolbar of the new message window:
- Send - Sends your message to the designated recipients.
- Save as Draft - Saves the message in its current state to the Drafts folder wihtout actually sending it. This is useful if you need to continue writing the message at a later time.
- Attach Files - Allows you to attach files to the message. When files are attached to an outgoing message, a file manager will display at the bottom of the new message window. The file manager will display the name, size, and upload status of the file. Attachments must reach an upload status of 100% before the item is actually attached to the message. In addition, files that are attached to messages should NOT contain commas as this will corrupt the upload and attachment.Note: To remove an attached file prior to sending the message, click the trash icon in the file manager.
- Link From - Uses SmarterMail's File Storage feature to insert a link to a file saved on the mail server or connect a Google Drive account to SmarterMail. Either way, the links can be sent to recipients who can then download the linked file(s).
- Flags - Specifies delivery options and/or marks the message for follow-up.
- Message Priority - Specifies the importance of the message. By default, messages have a normal level of priority.
- Request a Read Receipt - Sends an email confirmation to the sender when the recipient opens the message.
- Mark for Follow-up - Marks the message for follow-up. For more information, see Marking Email for Follow-ups .
Replying to Email Messages
Alternatively, you may want to reply to the sender or to all of the recipients of a message. SmarterMail gives users two options for replying to a message:
- Reply - Addresses a response to the sender only.
- Reply All - Addresses a response to the sender and everyone else who received the message. This includes all email addresses listed in the To and Cc fields, except your own email address.
When replying to a message, SmarterMail automatically fills in the address fields with the email addresses of the recipients from the original message, the subject field with the subject from the original message preceded by "Re" (which means "regarding" or "in regards to"), and the text box with the text from the original message. It is possible to edit any of these pre-filed fields, however, as needed. All other message options are the same as when composing a new message.
Forwarding Email Messages
You may also want to simply forward a message to a third-party or to someone not already copied on the original message. This is very easy to do:
- Forward - Allows you to send the message to a third-party, not in the To or Cc fields.
When forwarding a message, SmarterMail automatically fills in the subject field with the subject from the original message preceded by "Fwd" (which means "Forward"), and the text box with the text from the original message. It is possible to edit any of these pre-filed fields, however, as needed. All other message options are the same as when composing a new message.
Additional Options
- Delete - Moves the message to the Deleted Items folder. Note: This is the default action taken when a message is deleted. Depending on your account settings, the delete action may be different. For more information, see Deleting Email Messages.
- Move - Moves the selected message(s) to any available folder.
- Mark - Click this button and select the appropriate option to mark the selected message(s) as follow-up, no follow-up, or spam.
- Follow-up - Marks the selected message(s) for follow-up and changes the color of the follow-up flag appropriately.
- No follow-up - Removes the selected message(s) as being marked for follow-up and changes the color of the follow-up flag appropriately.
- Spam - Marks the message as spam and moves it to the Deleted Items folder.Note: SmarterMail uses Bayesian filtering to evaluate the header and content of an incoming message and determine the probability that it is spam. This type of spam filtering "learns" to differentiate real mail from unwanted junk mail by examining the words and punctuation in large samples of both types of messages. As a result, every time a user marks a message as spam, the Bayesian filtering improves. For users with the Message Sniffer or Cyren Premium Antispam add-on, messages marked as spam will be sent to the appropriate center for evaluation.
- Add - Creates a new task and links it to the message. For more information, see Linking to Email Tasks.
- View - By default, SmarterMail displays messages in HTML format because it provides formatting and markup capabilities that are not available in plain text. However, there may be times when you want to view the message in a different format or you need to view more than the message content. The different view options are as follows:
- HTML - Displays the message in HTML format, which allows for colors, fonts, graphics, and other formatting.
- Text - Displays the message in plain text, which only allows text content with no special formatting or graphics.
- Raw Content - Displays the content of the email exactly as the server received it. This is helpful if you cannot view the message in any other display mode.
- Header - Displays the header of the message, which indicates the path the email took to get to your email account, along with several other pieces of information.
- Print - Prints the message in whatever View you're in. For example, if you're viewing the raw content of the message then hit the print button, you will print the raw content.
- Close - If a message is opened in a new window, this closes the window.
Logging in to my email account
Logging in to SmarterMail's Webmail Interface
To log in to the SmarterMail Web interface, users will need to obtain the appropriate link from their domain administrator or system administrator. Generally, this will take the form of a standard email URL such as http://mail.example.com. To login to SmarterMail, simply type your full email address and password in the appropriate fields and click Login.
Logging in with a Smartphone
The mobile interface is accessible either from the link provided on the main SmarterMail webmail interface login page or as http://mail.example.com/mobile that is provided by a domain or system administrator.
Plesk Control Panel
FileZilla FTPS Tutorial
FileZilla FTPS Tutorial
FileZilla is a File Transfer Protocol program available for free.
Installing FileZilla
Follow this link to download FileZilla. Select "save this file to disk" option when download window opens. Save this file to your desktop. *** If you don’t have option to choose where to save the download then the file will be located in the computer’s downloads folder. The download will begin. You may need to click "Close" when the download is complete. To install the program, double-click its icon located on the desktop or in the download folder of your computer depending on the location that it was downloaded to. Go through the installation process.
Configuring FileZilla
1) Start the program by going to the Start > All Programs > FileZilla FTP Client > FileZilla on the bottom left-hand corner of your computer screen. *** If you are using Windows 8.1 then go to the START screen by clicking the icon on the lower left part of the screen. Now type FileZilla (when you start typing a search box will open). Now right click on the FileZilla search result and you can choose to pin it to your start screen or the task bar. Going forward the program will be available to start from your chosen location. Click the FileZilla icon to start the program.

2) Click File and then Site Manager.

3)Click on New Site.
4)Type the following information into the fields provided:
- Site Name: klhost sdn bhd
- Host: klhost.com
- Protocol: FTP – File Transfer Protocol
- Encryption: Require implicit FTP over TLS
- Logon Type: Normal
- User: Your username
- Password: Your password
- Click “Connect” to access your ftp directory

5)You are prompt to trust the certificate

6) Click OK to logon to the FTP server 7) You should see your directory on the ceweb.uml.edu FTP server on the right side of the interface.
*Please note: Some instructors may require you to download files from a course directory on the server. If your instructor requires this, double click the yellow folder with a question mark (see figure below) in the right side of the window. Click the folder with the number that corresponds to your course (ex: 90.230.031).
Follow the steps below to upload or download files to the web.
How to enable Gzip compression?
Enable compression via .htaccess
For most people reading this, compression is enabled by adding some code to a file called .htaccess on their web host/server. This means going to the file manager (or wherever you go to add or upload files) on your webhost.
The .htaccess file controls many important things for your site. If you are not familiar with the .htaccess file, please read my working with .htaccess article to get some know how before changing it.
The code below should be added to your .htaccess file...
<ifModule mod_gzip.c> mod_gzip_on Yes mod_gzip_dechunk Yes mod_gzip_item_include file .(html?|txt|css|js|php|pl)$ mod_gzip_item_include handler ^cgi-script$ mod_gzip_item_include mime ^text/.* mod_gzip_item_include mime ^application/x-javascript.* mod_gzip_item_exclude mime ^image/.* mod_gzip_item_exclude rspheader ^Content-Encoding:.*gzip.* </ifModule>
Save the .htaccess file and then refresh your webpage.
Check to see if your compression is working using https://checkgzipcompression.com/
Why I'm getting Error 503 Service Temporary Unavailable error on my site?
It is more likely the restricted concurrent connection hit, you shall consider upgrade your hosting account to higher level package to suit your web hosting needs.
Or
It is more likely that your website had been suspended due to website had been hacked or compromise or we receive complains from malaysia cyber security.
Please contact our support team to get further verification.
How can I increase the limit of the resource Setting?
Unfortunately you are not allowed to do that, you could contact the support team to get any advice to upgrade to an appropriate hosting plan.
Can I disable resource limit from my account?
The answer is simply no as it is applied to the server wide for all shared hosting.
What is the resource limit being set?
It will be following the shared environment server resource available from our product page such as detail below. Please also refer to the Hosting package HERE CPU Usage: 40% of the server CPU Maximum Memory Usage: 512MB
Installing Wordpress Web Applications
Web applications are software products designed to be installed on websites to add functionality and improve user experience. A wide range of applications covering many different user scenarios are available from the Plesk Application vault, and can be installed from the Plesk interface with a minimum of effort.
To install an application, go to Applications > Install or Install (Custom) or Install Version.

Uploading Content Using the File Manager
To upload content, go to Files, navigate to the folder to which you want to upload content, click Upload, select the file to be uploaded, and click Open.
Note that when uploading multiple files it is recommended to add them to an archive, upload the archive, and extract the files to save time. Only ZIP archive files are supported at the present time.

To download a file, go to Files, navigate to the location of the file you want to download, click the ![]() icon next to the file you want to download, and select Download from the menu.
icon next to the file you want to download, and select Download from the menu.

To compress files, go to Files, navigate to the location of the file or folder you want to compress, select the checkbox next to it, and click Add to Archive.

To extract files from an archive, go to Files, select the checkbox next to the file you want to extract, and click Extract Files.

To edit files, go to Files, navigate to the location of the file you want to edit, and do either of the following:
- To edit the file in the code editor, click the
 icon next to the file you want to edit, and select Edit in Code Editor from the menu.
 - To edit the file in the HTML editor, click the icon next to the file you want to edit, and select Edit in HTML Editor from the menu.
- To edit the file in the text editor, click the
 icon next to the file you want to edit, and select Edit in Text Editor from the menu.

To change the FTP Login
To change the FTP account username or password, go to Websites & Domains > Web Hosting Access.

Then specify new username and password for the System User.

Selecting PHP Version
To change the PHP version, go to Websites & Domains > Hosting Settings and select the required version in the PHP version menu.

Setting the Default Homepage
-
To change the default index page in Plesk for Linux:
- Go to Websites & Domains > Apache & Nginx Settings.

- Select the Enter custom value option in the Index files section. Specify the file name or names to be used as the default page. You can specify more than one, separating the file names from each other with white spaces. For example, if you specify "index.htm index.php", the web server will serve index.htm as the default page. If the file with such name is not found, index.php will be served.

To change the default index page in Plesk for Windows:
- Go to Websites & Domains > IIS Settings.

- Select the Enter custom value option in the Default documents section. Add or remove file names from the list. The web server will be looking for the default page file starting from the topmost entry in the list and continuing downwards. For example, if you specify "index.htm" with "index.php" right underneath it, the web server will serve index.htm as the default page. If the file with such name is not found, index.php will be served.

- Go to Websites & Domains > Apache & Nginx Settings.
Logging Out of Plesk
To log out of Plesk, place the mouse pointer over your username located at the top of the page, and click Log out.

Changing Your Password for Access to Plesk
To change your password, place the mouse pointer over your username located at the top of the page and click Edit Profile, or go to My Profile. Type in your new password and confirm it.

Logging In to Plesk for the First Time
You can log in to Plesk by visiting the following URL or IP provided:
https://www.example.com:8443 or https://192.168.0.1:8443Type in your username and password to log in.
When you first log in to Plesk as a shared hosting customer, you will be asked to fill out a form with contact information, such as:
- Your company name.
- Your phone number and email.
- Your address and country of residence.
This information will be used by your provider to contact you in case of possible issues. The form also enables you to set a new password for your user account. This password is used together with your username to log in to Plesk. You cannot change your username by yourself. If you want to change your username, contact your provider.
CPanel
FileZilla FTPS Tutorial
FileZilla FTPS Tutorial
FileZilla is a File Transfer Protocol program available for free.
Installing FileZilla
Follow this link to download FileZilla. Select "save this file to disk" option when download window opens. Save this file to your desktop. *** If you don’t have option to choose where to save the download then the file will be located in the computer’s downloads folder. The download will begin. You may need to click "Close" when the download is complete. To install the program, double-click its icon located on the desktop or in the download folder of your computer depending on the location that it was downloaded to. Go through the installation process.
Configuring FileZilla
1) Start the program by going to the Start > All Programs > FileZilla FTP Client > FileZilla on the bottom left-hand corner of your computer screen. *** If you are using Windows 8.1 then go to the START screen by clicking the icon on the lower left part of the screen. Now type FileZilla (when you start typing a search box will open). Now right click on the FileZilla search result and you can choose to pin it to your start screen or the task bar. Going forward the program will be available to start from your chosen location. Click the FileZilla icon to start the program.
2) Click File and then Site Manager.
3)Click on New Site.
4)Type the following information into the fields provided:
- Site Name: klhost sdn bhd
- Host: klhost.com
- Protocol: FTP – File Transfer Protocol
- Encryption: Require implicit FTP over TLS
- Logon Type: Normal
- User: Your username
- Password: Your password
- Click “Connect” to access your ftp directory
5)You are prompt to trust the certificate
6) Click OK to logon to the FTP server 7) You should see your directory on the ceweb.uml.edu FTP server on the right side of the interface.
*Please note: Some instructors may require you to download files from a course directory on the server. If your instructor requires this, double click the yellow folder with a question mark (see figure below) in the right side of the window. Click the folder with the number that corresponds to your course (ex: 90.230.031).
Follow the steps below to upload or download files to the web.
How to enable Gzip compression?
Enable compression via .htaccess
For most people reading this, compression is enabled by adding some code to a file called .htaccess on their web host/server. This means going to the file manager (or wherever you go to add or upload files) on your webhost.
The .htaccess file controls many important things for your site. If you are not familiar with the .htaccess file, please read my working with .htaccess article to get some know how before changing it.
The code below should be added to your .htaccess file...
<ifModule mod_gzip.c> mod_gzip_on Yes mod_gzip_dechunk Yes mod_gzip_item_include file .(html?|txt|css|js|php|pl)$ mod_gzip_item_include handler ^cgi-script$ mod_gzip_item_include mime ^text/.* mod_gzip_item_include mime ^application/x-javascript.* mod_gzip_item_exclude mime ^image/.* mod_gzip_item_exclude rspheader ^Content-Encoding:.*gzip.* </ifModule>
Save the .htaccess file and then refresh your webpage.
Check to see if your compression is working using https://checkgzipcompression.com/
Why I'm getting Error 503 Service Temporary Unavailable error on my site?
It is more likely the restricted concurrent connection hit, you shall consider upgrade your hosting account to higher level package to suit your web hosting needs.
Or
It is more likely that your website had been suspended due to website had been hacked or compromise or we receive complains from malaysia cyber security.
Please contact our support team to get further verification.
How can I increase the limit of the resource Setting?
Unfortunately you are not allowed to do that, you could contact the support team to get any advice to upgrade to an appropriate hosting plan.
Can I disable resource limit from my account?
The answer is simply no as it is applied to the server wide for all shared hosting.
What is the resource limit being set?
It will be following the shared environment server resource available from our product page such as detail below. Please also refer to the Hosting package HERE CPU Usage: 40% of the server CPU Maximum Memory Usage: 512MB
How can I forward my old website to my new site?
You can do this with a redirect. To set up a redirect, perform the following steps:
- Log in to your old site's cPanel interface.
- Navigate to cPanel's Redirects interface (Home >> Domains >> Redirects).
- Set the old site's index page to redirect to the new site's index page.
If you want the old site and the new site to go to the same location, but you have not yet set up the new site, you can use aliases. An alias allows you to add a second domain name to your account that goes to the same website
How can I customize my error pages?
You can customize your error pages with cPanel's Error Pages interface (Home >> Advanced >> Error Pages).
How can I change my password in cPanel?
If you remember your old password, click Password & Security in the user menu to navigate to cPanel's Password & Security interface (Home >> Preferences >> Password & Security).
If you forgot your password, your web hosting provider can reset it for you in WHM.
You can also reset your password via email if your web host enables the Email password reset setting in WHM's Tweak Settings interface (Home >> Server Configuration >> Tweak Settings).
How to Log into Your CPanel
How to access cPanel
http://192.168.0.1:2082— Access cPanel over an unencrypted connection with your IP address.http://example.com:2082— Access cPanel over an unencrypted connection with your domain name.
 Then, decide whether you wish to log in via your cPanel account or an alternate authentication method:
Perform the following steps:
Then, decide whether you wish to log in via your cPanel account or an alternate authentication method:
Perform the following steps:
- Enter your cPanel username in the Username text box.
- Enter your password in the Password text box.
- Click Log in.
why customers us!
wow! running linux already? so fast!
- Dzul - uticservices.com
Ah ic... ok noted with thanks. Thank you for your help once again and have a great day!
- Lee Lee - bodymindsoul.com.my
Many thanks for your prompt action, Jon. I believe this has solved the issue for us.
- Augustine Soh - rabinco.com.my
It is a such a quick job and thank you so much.
- MJ Joe - s2slimming.com.my
Thanks for the info and for helping us upload the folder. Now the exploration starts...
- Alice - acention.com
Good Day. User already received customer email, thanks for your support.
- boon sing - www.megalb.com
Thanks Jon. You may close this ticket. Great response and support from KLHOST. I am very impressed :).
- benny - www.fashiontime.com.my
hi sir, Very helpful customer support. we rebooted the router and its working fine. thanks
- Mallavarapu Christopher - www.andaraya.com.my
Hi, sorry for late reply. So far that all that I want to know. Next time I will let you…
- wafiuddin - www.tanahair.my
Thank you attari, all looks good now. Much appreciated. Cheers
- Sevaram Narayanasamy - www.pactcapital.com